
It’s long been best practice to ensure that the PDF documents you file electronically with the court are text searchable.
That’s because one can navigate searchable documents by looking up specific words and phrases, add markup (like comments) to specific sections, and copy and paste individual blocks of text. The result is a much more convenient experience for those reading and handling the documents.
While it has long been a good idea, in California courts from January 1, 2017, it will be required that you submit text searchable documents when eFiling — including your exhibits — to the greatest extent technologically feasible.
Here’s what you need to know to ensure that you’re compliant and your documents are text searchable.
Understanding the different types of PDF
PDFs can be categorized in three ways, depending on how the file was created. How it originated also defines whether the content of the PDF can be searched or copied and pasted or whether it is “locked” in an image of the page.
- Text-based or “true” PDFs: Digitally created PDFs, sometimes called “true” PDFs, are made by directly saving a document being drafted in a word processor (like Microsoft Word) as a PDF or by using the “print to PDF” function.
- Image-based PDFs: Image-only PDFs are created through scanning, taking photographs, or taking screenshots. These documents are “locked” in a snapshot type image and are not searchable, cannot be copied and pasted, and cannot be marked up.
- OCR’d or “made-searchable” PDFs: Image-based PDFs can be made text searchable via the application of optical character recognition (OCR). During the OCR process, characters and the document structure are “read.” As a result, a text layer is added to the image layer. Such documents become similar to “true” PDFs — though, depending on the quality of the image, or the recognizability of the writing, may not be 100% accurate.
Method 1: Publish directly from your word processing software (preferred)
If you want to guarantee that your final text searchable document exactly matches your original draft, then you must publish it directly as a PDF.
In the recent past, this was a complicated process that leads to some people resorting to printing and scanning to create PDFs. Today it is a quick and straightforward process. It’s never necessary to print out and scan documents you’ve written yourself in a word processor to make them into a PDF.
To save a Microsoft Word document as a PDF, follow these steps:
Step ONE
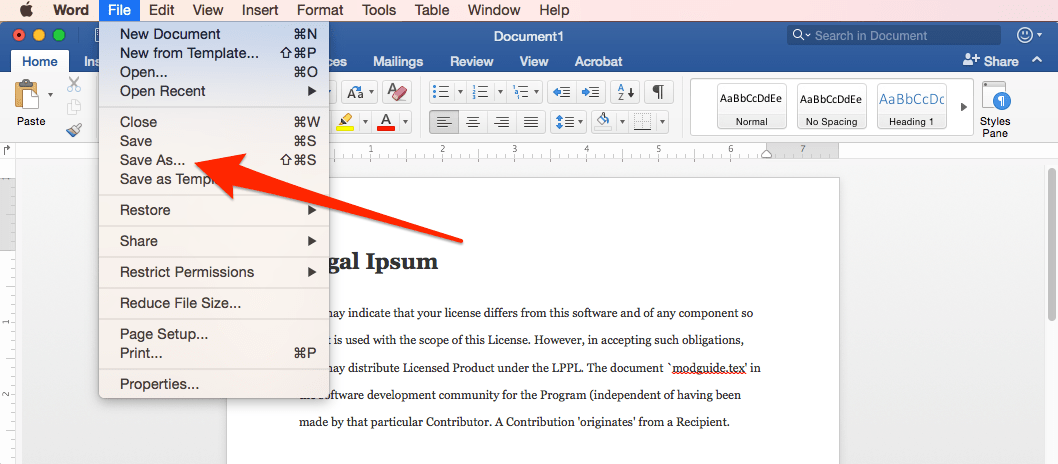
Open your document in Microsoft Word. Next, click on File and then Save As.
Step TWO
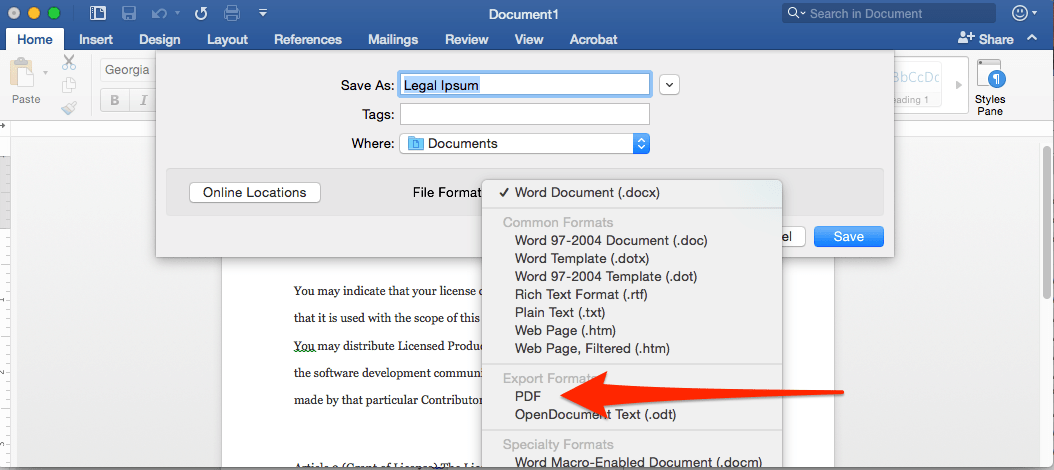
The Save As dialog box will open. Next, click on the File Format drop down menu and choose PDF. To save your document as a PDF, click Save.
Method 2: Apply optical character recognition in your PDF software
Note: This section describes how to apply OCR in the most recent version of Adobe Acrobat. Other PDF editing software is available. Check out our buyer’s guide for more information.
Sometimes it just isn’t possible to save directly to PDF. For example, you mat have letters or other written exhibits that only exist in paper form or as photographs or items that are hand-written. To make these items text-searchable requires that you apply optical character recognition.
Step one
If your exhibits are not already in electronic form, you’ll need to create an image by either scanning or taking a photograph of the item. This will create an image file, possibly a PDF but just as likely an image file like a TIF, PNG, or JPG.
Step two
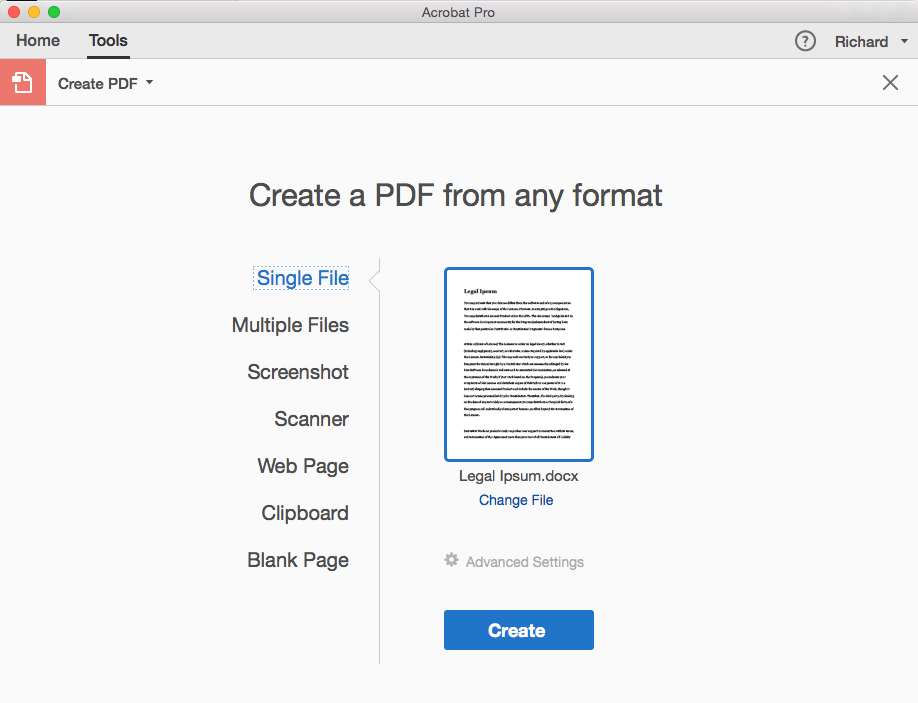
Open the image of your file as a PDF by using the Create PDF tool in Acrobat. Choose Create PDF in the Tools menu, select your file and click Create.
Step three
Your file will open as an image-based PDF. To apply OCR, choose Enhance Scans in the Tools menu. This will open the Enhance Scans menu at the top of the screen.
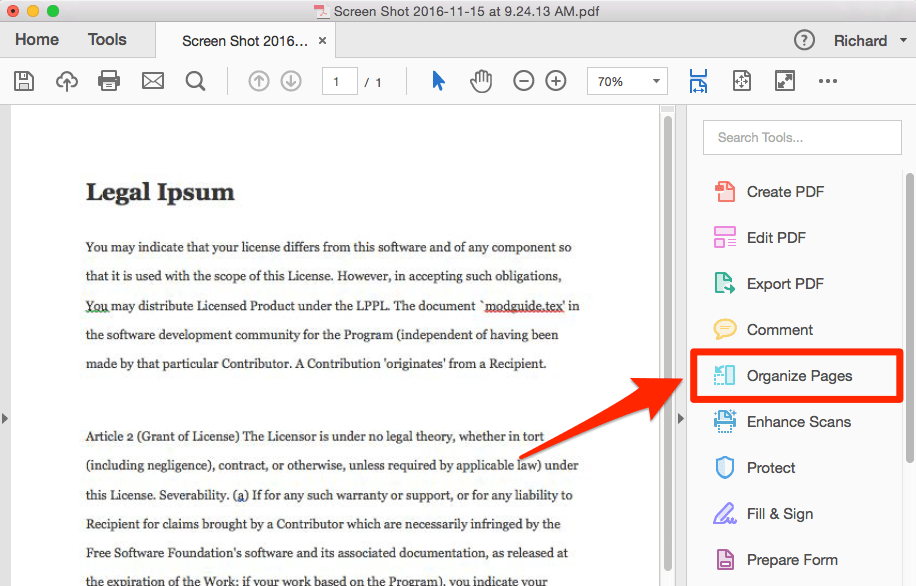
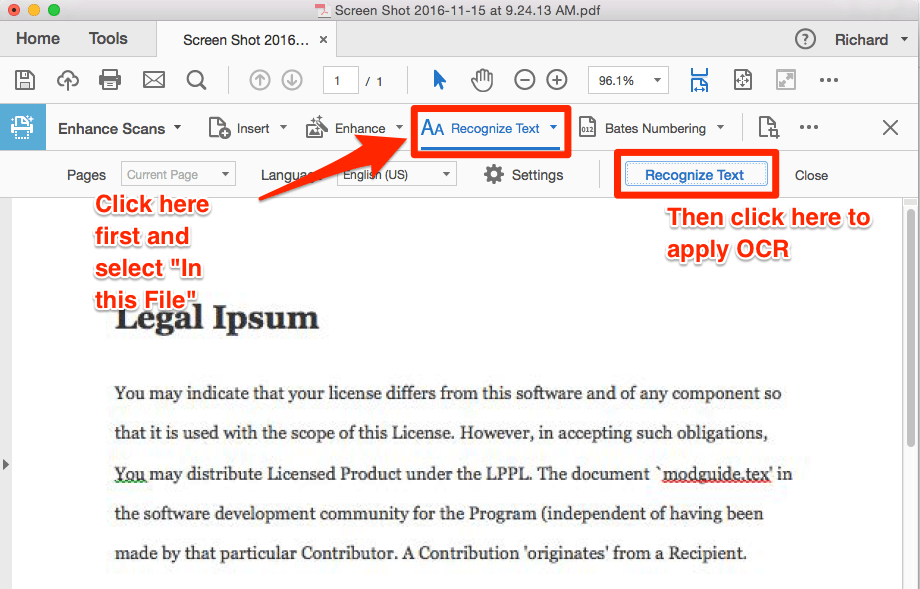
Step four
To apply OCR, select Recognize Text followed by In This File. A secondary menu will open. Make sure that you have the correct language selected and then click Recognize Text to begin the OCR process.
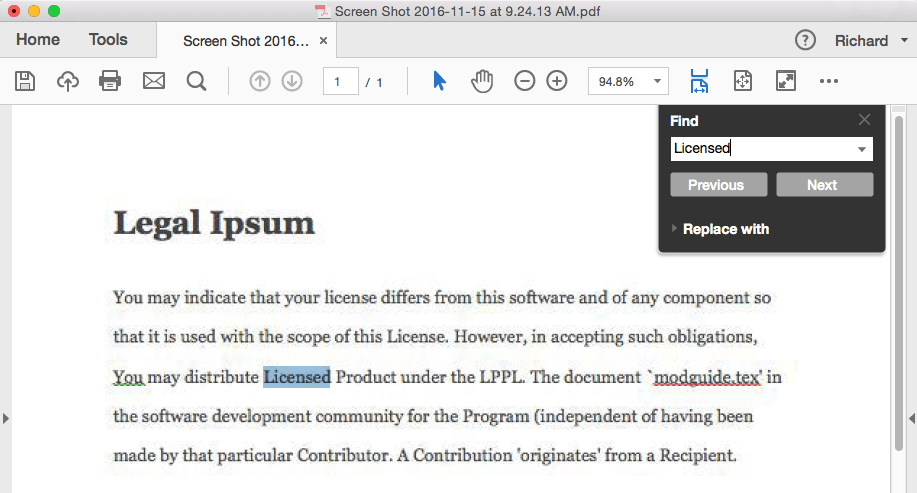
Step five
Finally, search for text in your PDF to check that the process has worked successfully. Use the keyboard shortcut Ctrl+F to open the Find menu. Type a word or phrase you know to be in the document. The word or phrase should become highlighted.
The accuracy of the text recognition will vary depending on the quality of the image you upload. Higher resolution scans and images will be recognized more accurately. The accuracy of hand-written documents can vary widely. You should audit your document carefully before considering it final.
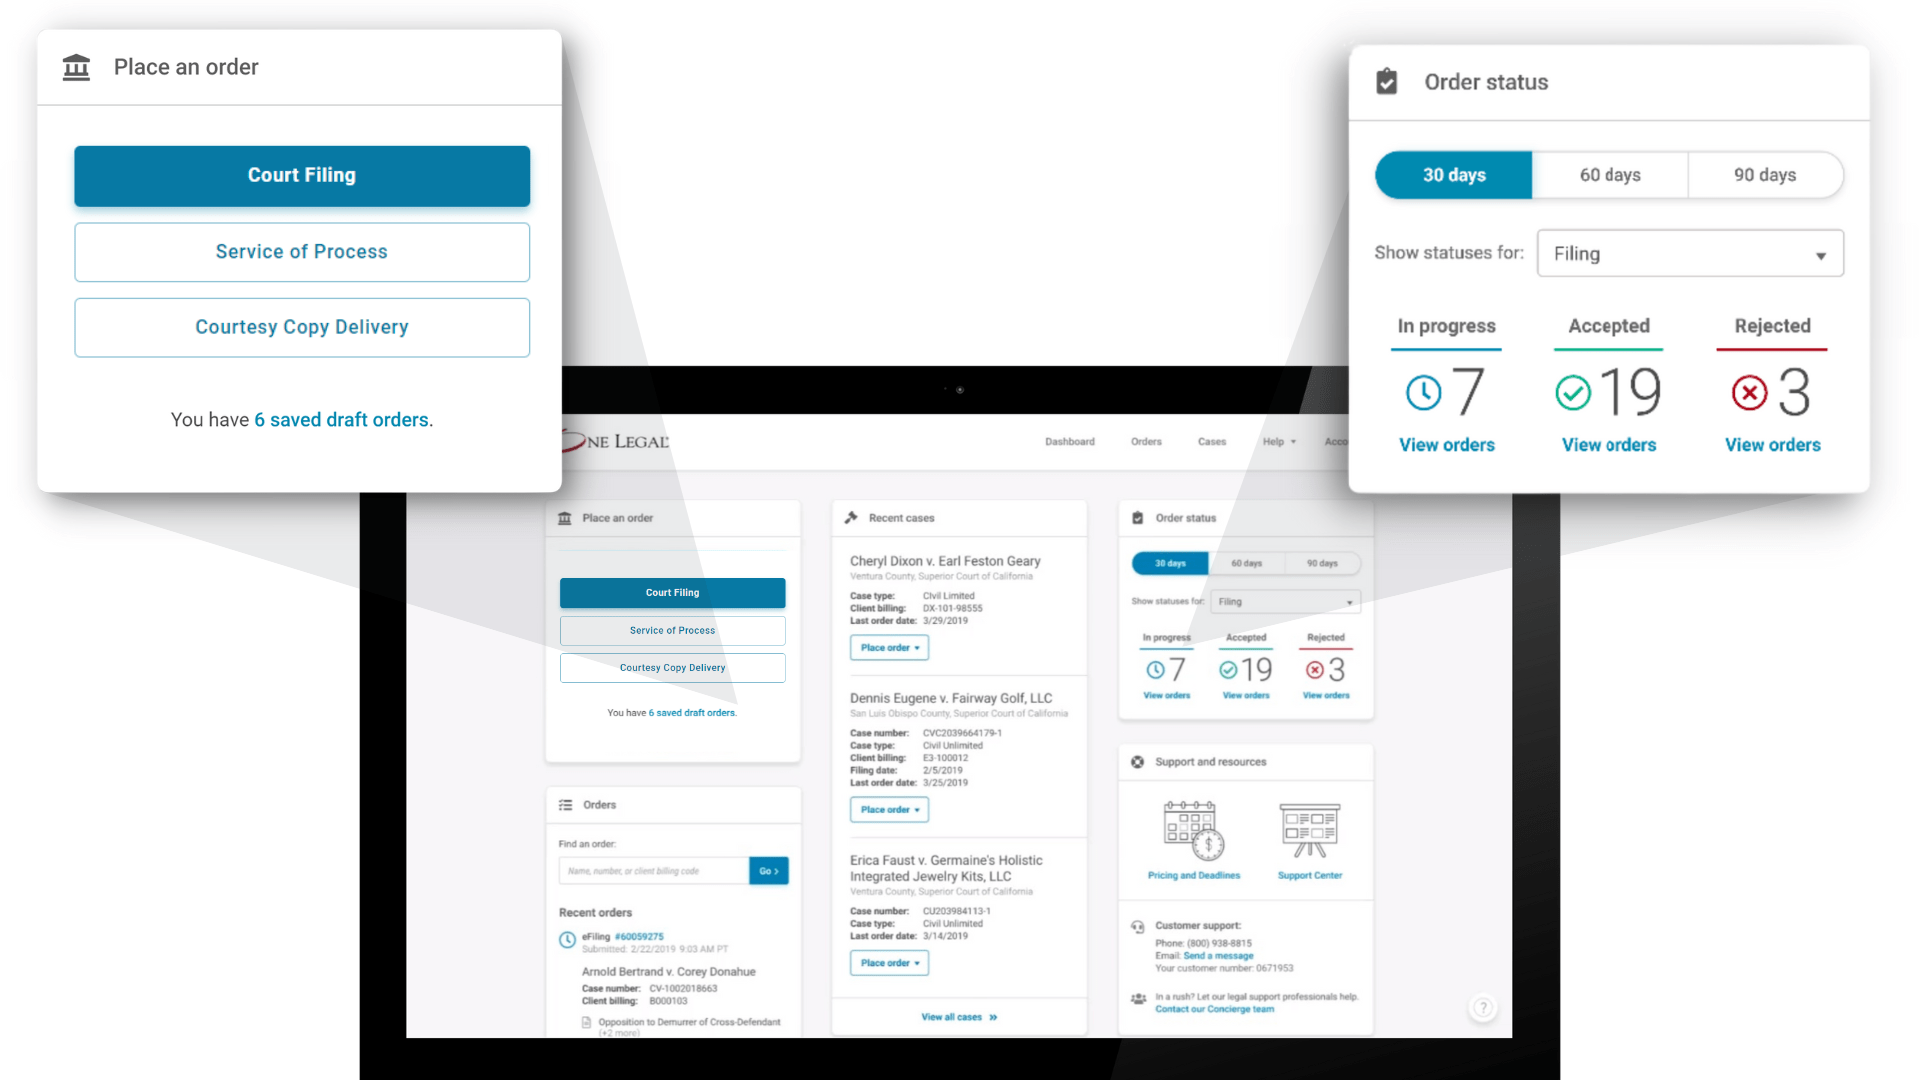
Read to see One Legal in action? Experience the most convenient way to manage your California court filing, nationwide process serving, and courtesy copy delivery. Request a demo.