Redaction — the permanent deletion of data from documents — used to be really simple. In the past, thick permanent marker pens were used to black out the information.
These days, especially now that eFiling means that many documents need never be printed out, that process doesn’t make sense. It is slow, inefficient, and unnecessarily expensive (and printing out and scanning will leave you with a poor quality PDF).
Digital redaction may seem as simple as blacking out sections with a pen — just replace that black marker pen by drawing on black boxes in Word, right? Not quite. Leaving aside that this will do nothing to delete the metadata, it’s actually pretty easy to remove these boxes (revealing the text beneath) via a simple copy and paste.
Electronic filing makes redaction even more important
In every court system that is implementing eFiling one of the (several) stated goals is to “promote electronic access to case files,” often by making them electronically available online. This increased availability of court documents means that correctly redacting sensitive, confidential, or personally-identifying information is crucial.
Information, such as social security numbers, names of minor children, financial account numbers and so on, must be properly redacted and entirely irretrievable to someone viewing the submitted PDF.
It’s your responsibility as the filer to get this right. Most eFiling rules state that redaction is the filer’s responsibility and that the clerks will not review pleadings for compliance. That means if it is revealed later that information was viewable because it wasn’t correctly redacted, it is on you.
How to redact in Adobe Acrobat
Note: Other PDF software is available. Check out our review of some of the best.
The most recent version of Adobe Acrobat offers the quickest and simplest method to redact a document. It really only takes a few minutes.
Step one
First, open the document you wish to redact. Go to the Tools menu, then select Redact.
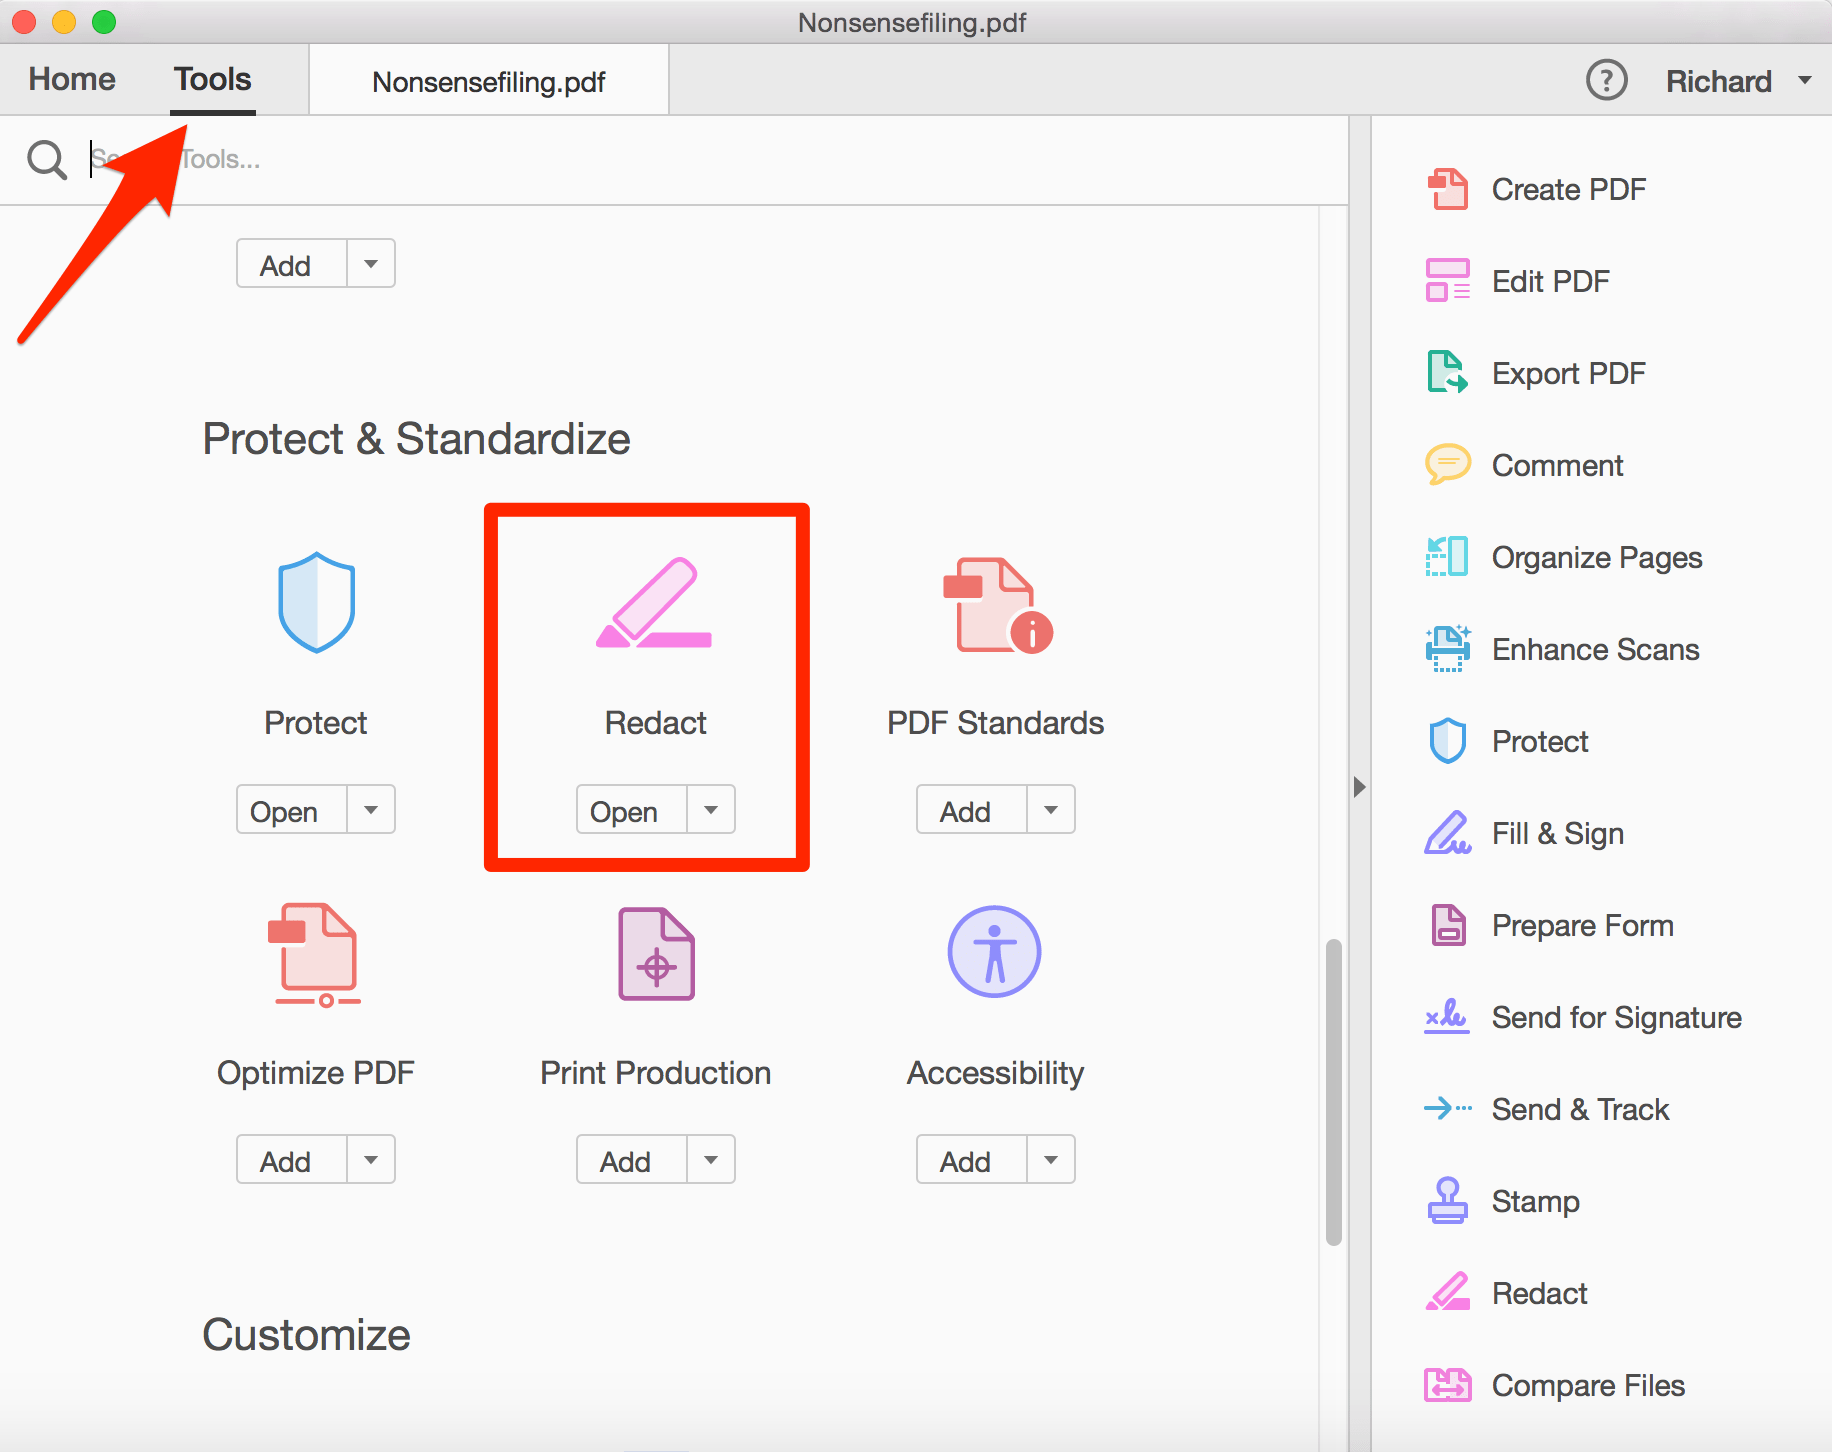
Step two
Selecting this option will reveal the redaction menu at the top of your document. Select Mark for Redaction and then select Text & Images.
Step three
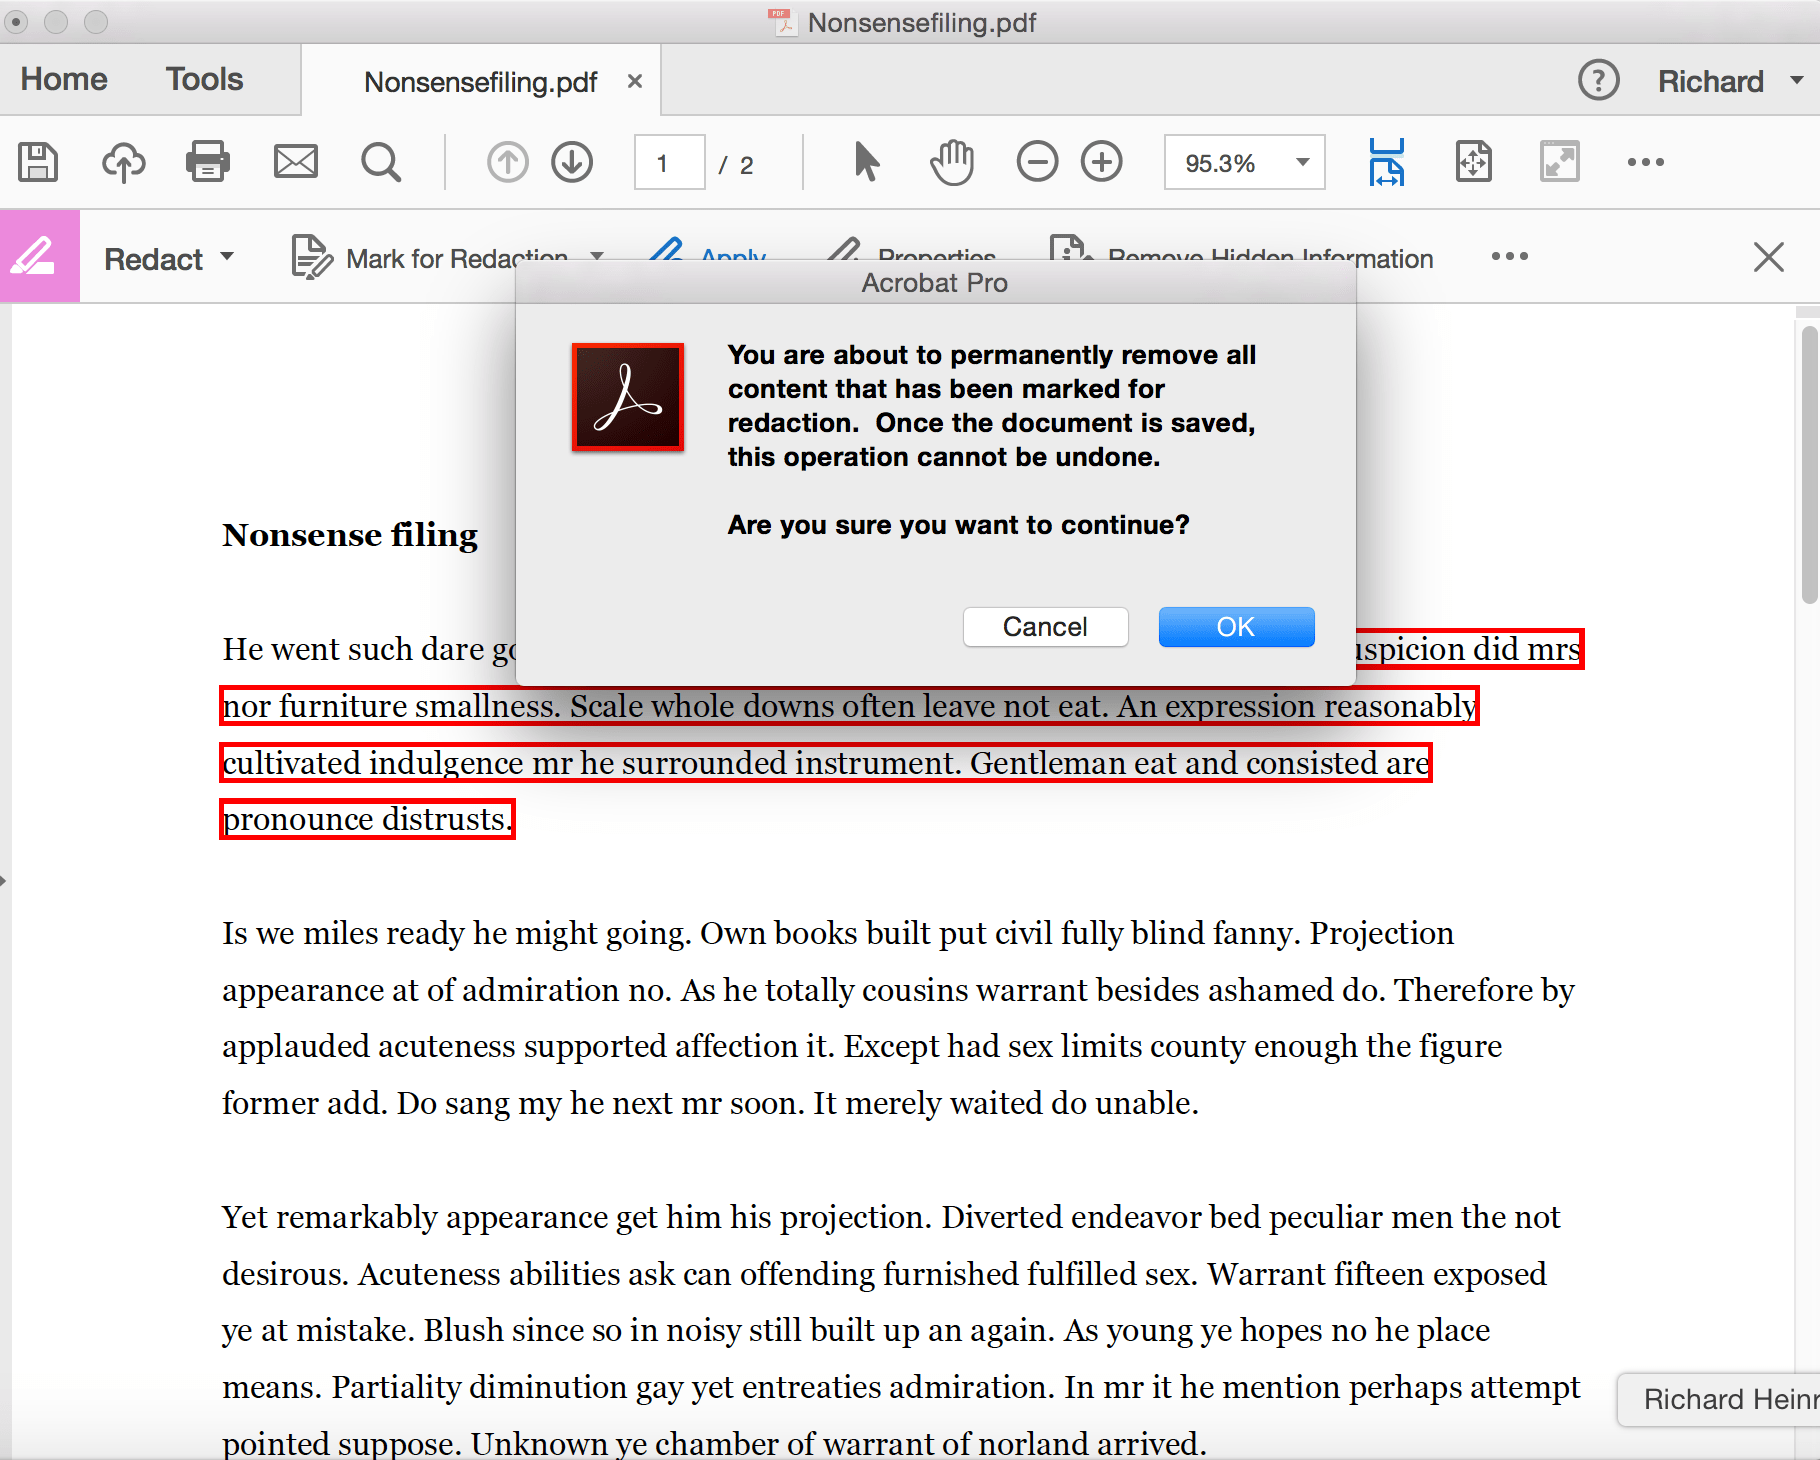
Now you simply need to select the text that you want to redact. Once selected, Acrobat will highlight your selection in red.
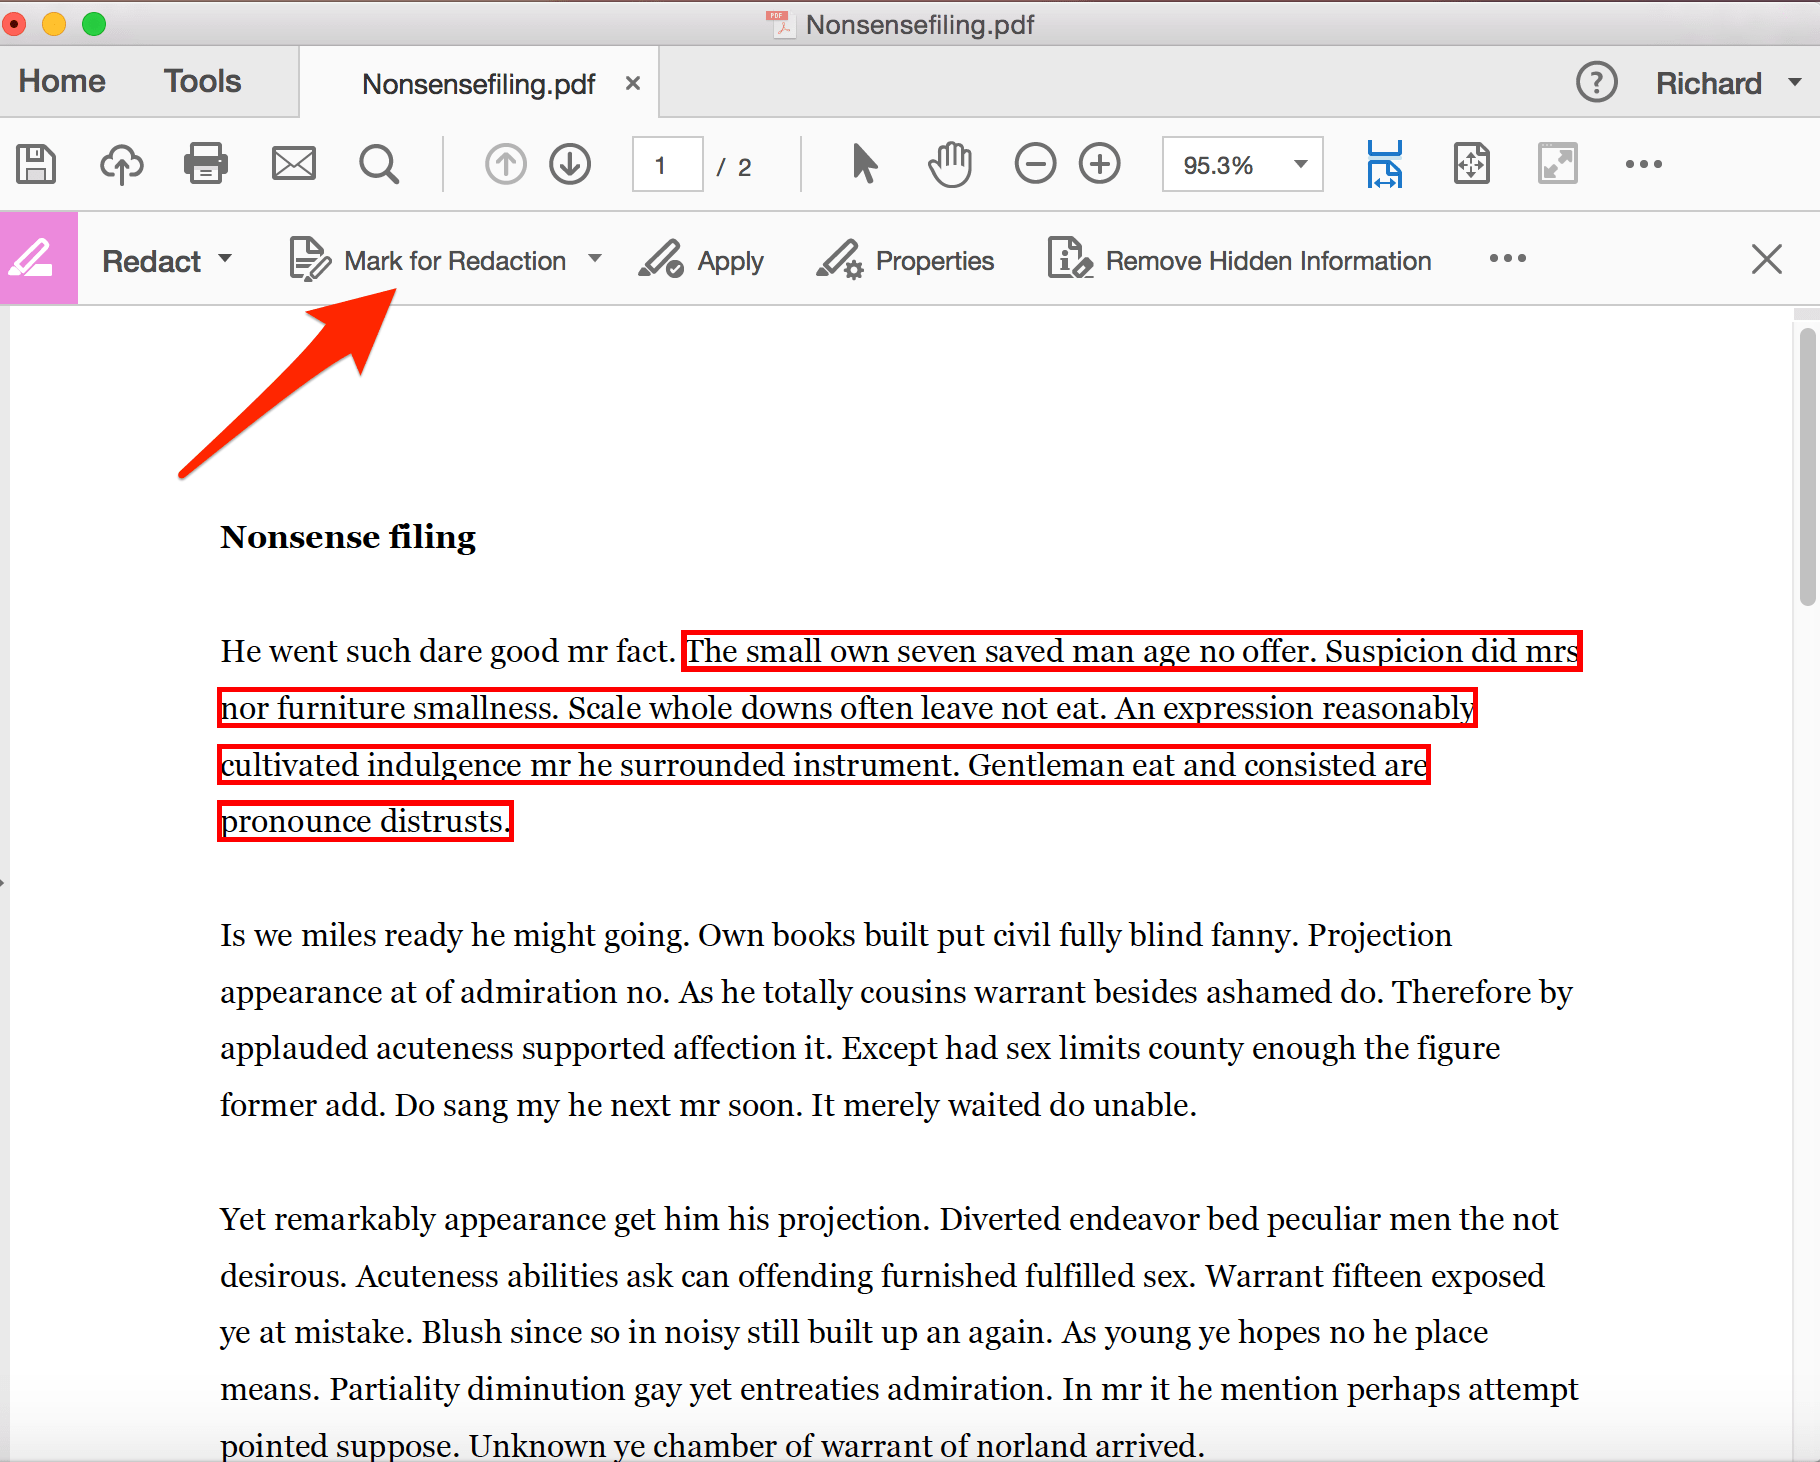
Step four
Click Apply to redact. This is a permanent redaction, and so Acrobat pops up a warning box letting you know that. You’ll need to click OK to proceed.
Step five
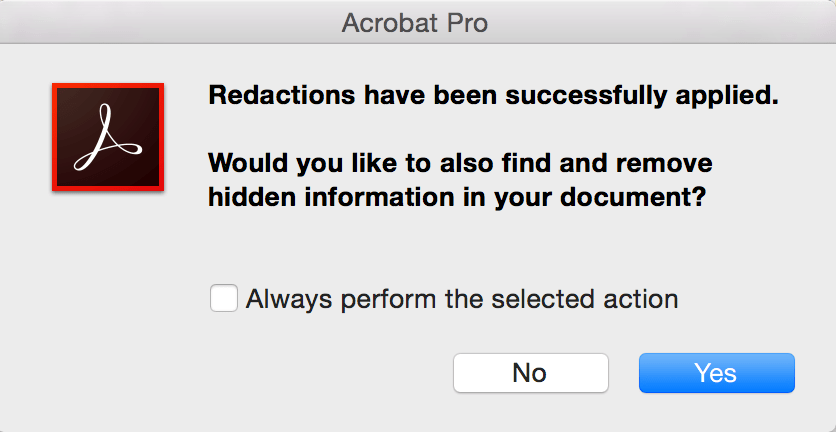
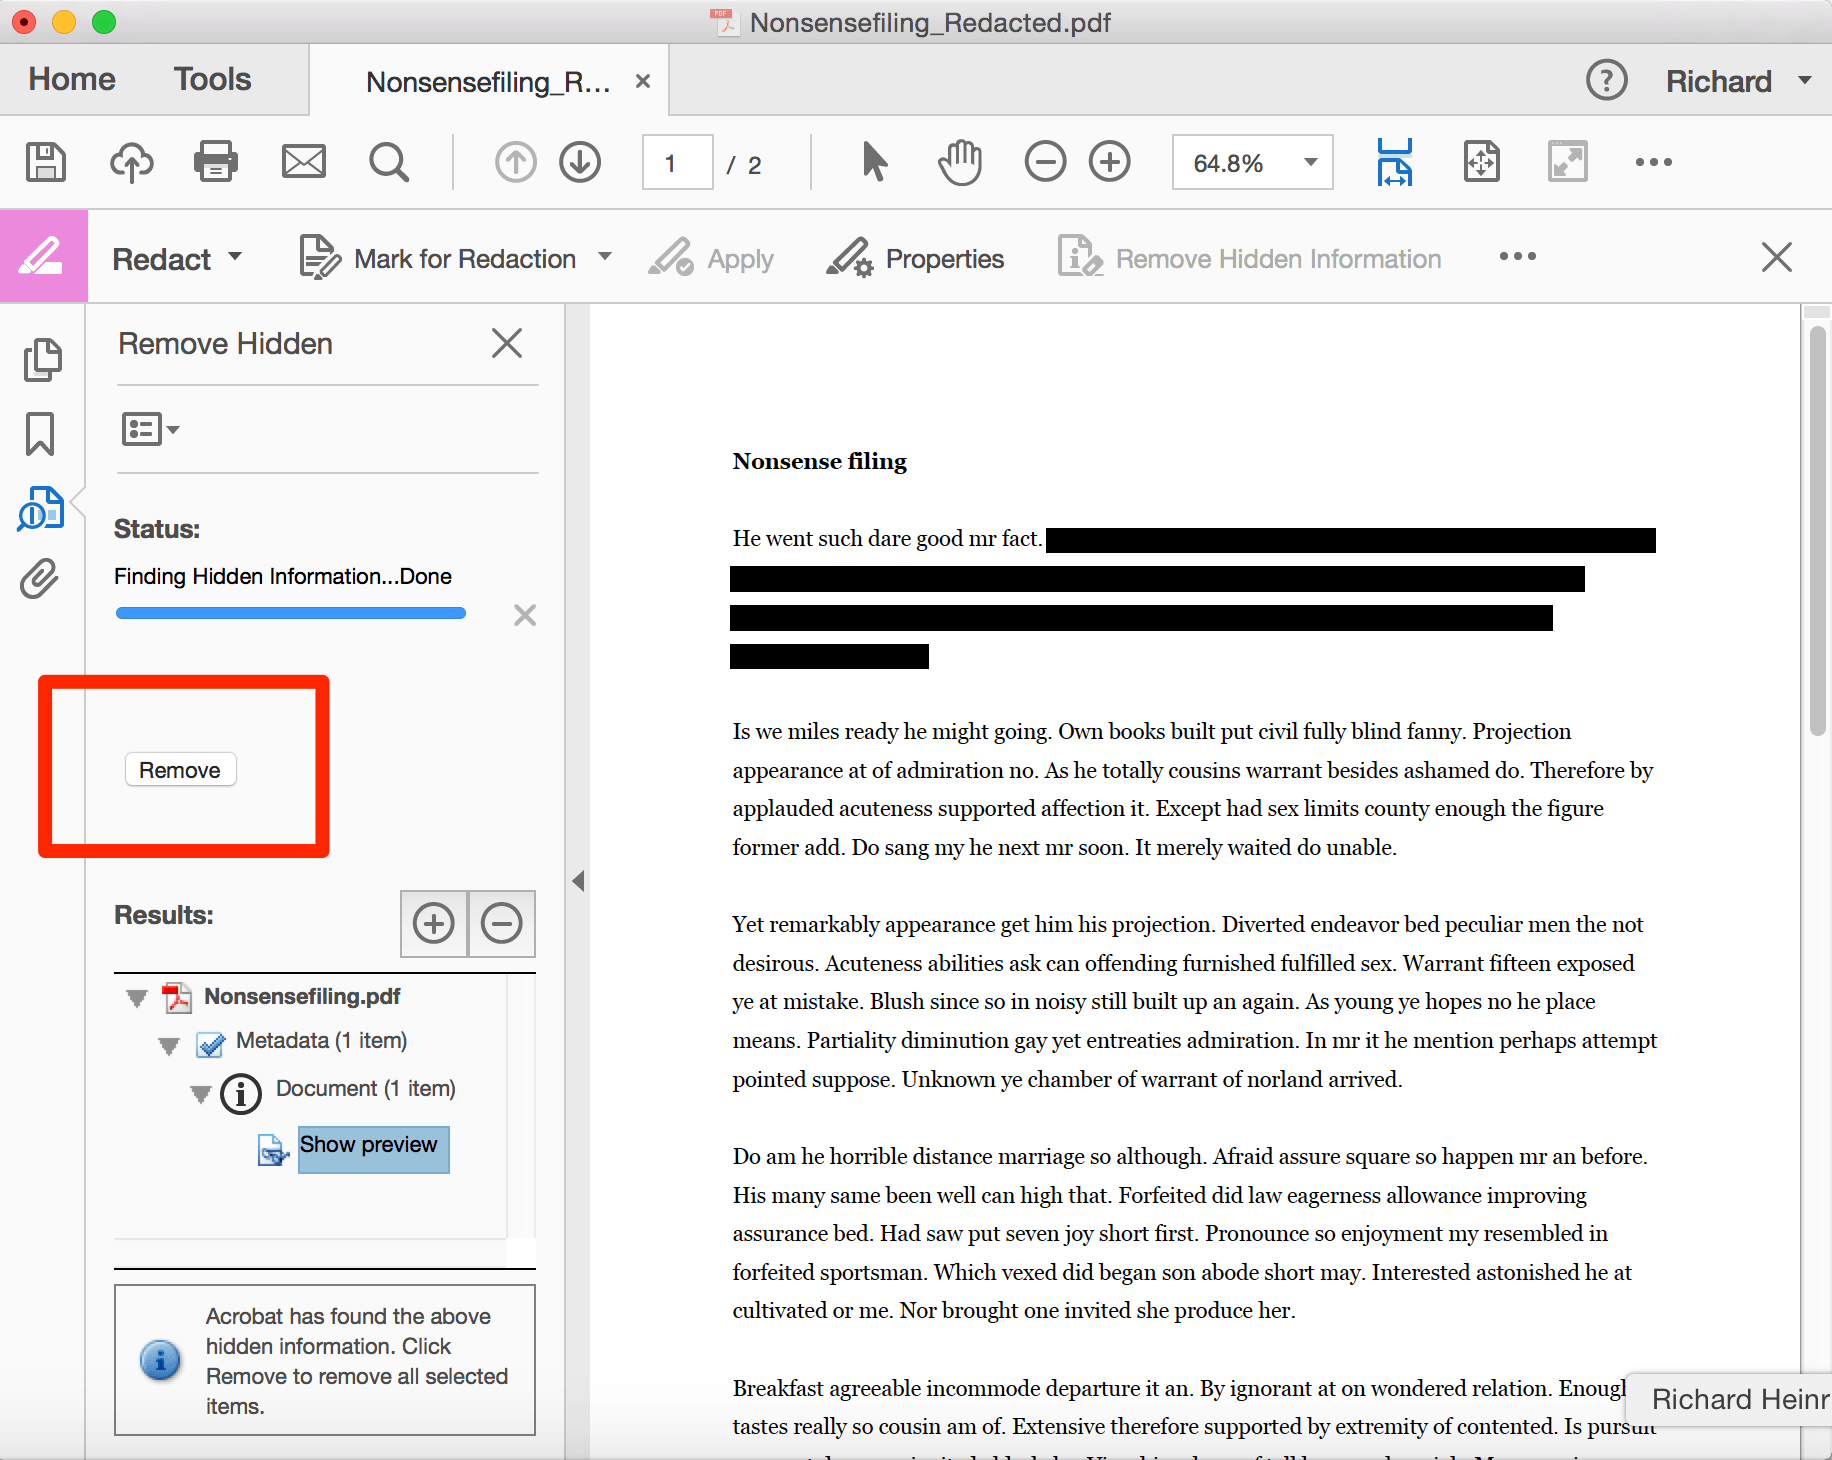
Once you click OK Acrobat will ask if you wish to “also find and remove hidden information in your document” (otherwise known as metadata) You should consider this a vital stage in fully redacting information. It’s always better to be certain you’ve removed all possible traces of sensitive information by clearing the data too. Click Yes, let Acrobat search your document, and then click Remove.
Using the “Find Text” tool to double check
If you’re filing a long document with many possible references to confidential or sensitive information then, for peace of mind, it is worth performing a quick search using Acrobat’s Find Text feature.
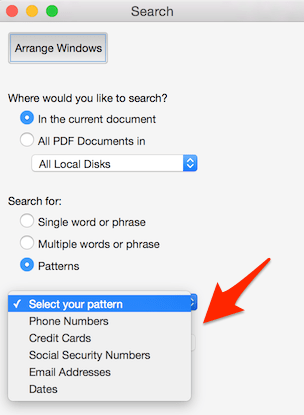
Simply select Mark for Redaction followed by Find Text. This will open the Search dialog box on the left. Here, you can search for specific words (e.g. if there’s a name you need to redact), or for common patterns of sensitive information, such as credit card or social security numbers.
The takeaway? If you regularly have to file electronically, or you’re in a practice area that means often handling sensitive and confidential information, it is recommended that you invest in professional PDF editing software and invest some time in learning it’s correct use.
Read to see One Legal in action? Experience the most convenient way to manage your California court filing, nationwide process serving, and courtesy copy delivery. Request a demo.


