The advent of electronic court filing means that knowing your way around PDF editing software, like Adobe Acrobat, is no longer an optional skill.
That’s because all states that introduce eFiling have ruled that only PDF documents will be accepted.
The good news is creating PDFs is simple — you can save directly to PDF from your word processor, scan items that you don’t have digital copies of, or rely on an eFiling service, like One Legal, to convert documents as you upload them for filing.
For anything other than the most simple of court filings, however, you’ll want to spend some time adding additional features like electronic bookmarks to simplify navigation. You shouldn’t stop at bookmarking, though: There are many more cool features in Acrobat. Here are three of our favorites.
We’re fans of Adobe’s professional PDF software, not least because it is so feature-rich yet user-friendly. However, other PDF editing tools are available. Here’s a run-down in a buyer’s guide we published last year.
Make any form fillable
This is for anyone who’s become so frustrated by non-editable PDF forms that you’ve resorted to printing it out and filling it in by hand. With Acrobat you can convert pretty much any form into a fillable form (that’s one you can complete by typing into it’s fields) in just a few steps.
STEP ONE
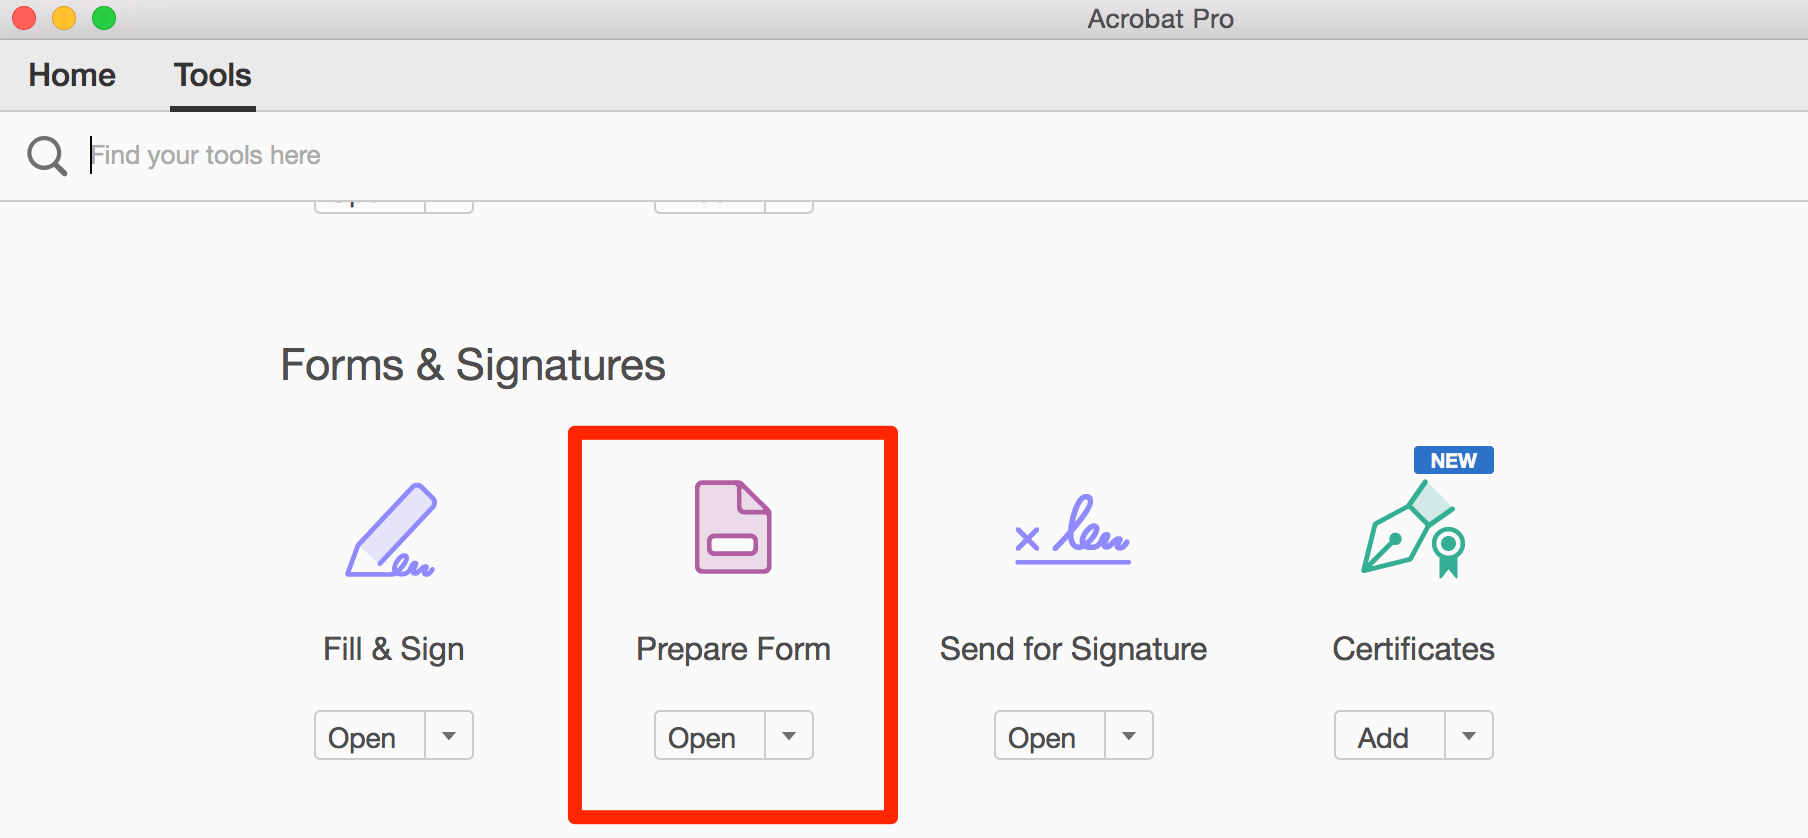
Open Acrobat and choose Tools. Find Prepare Form and click Open to get to the file you want to convert to a fillable PDF. You can convert all types files — Word or Excel documents, non-fillable PDFs, and even scanned paper documents! Once you’ve found your file, click Start.
Acrobat will do its best to automatically detect and create interactive form fields from the file you’ve uploaded. Usually, if you file is high quality, most legible form fields will be detected.
STEP TWO
Sometimes, Acrobat won’t detect a field and won’t add a text box. Don’t worry! You can quickly edit the scan and add your own. Simply select the type of field you need to enter (e.g. text, checkbox, etc.) from the toolbar at the top of the screen.
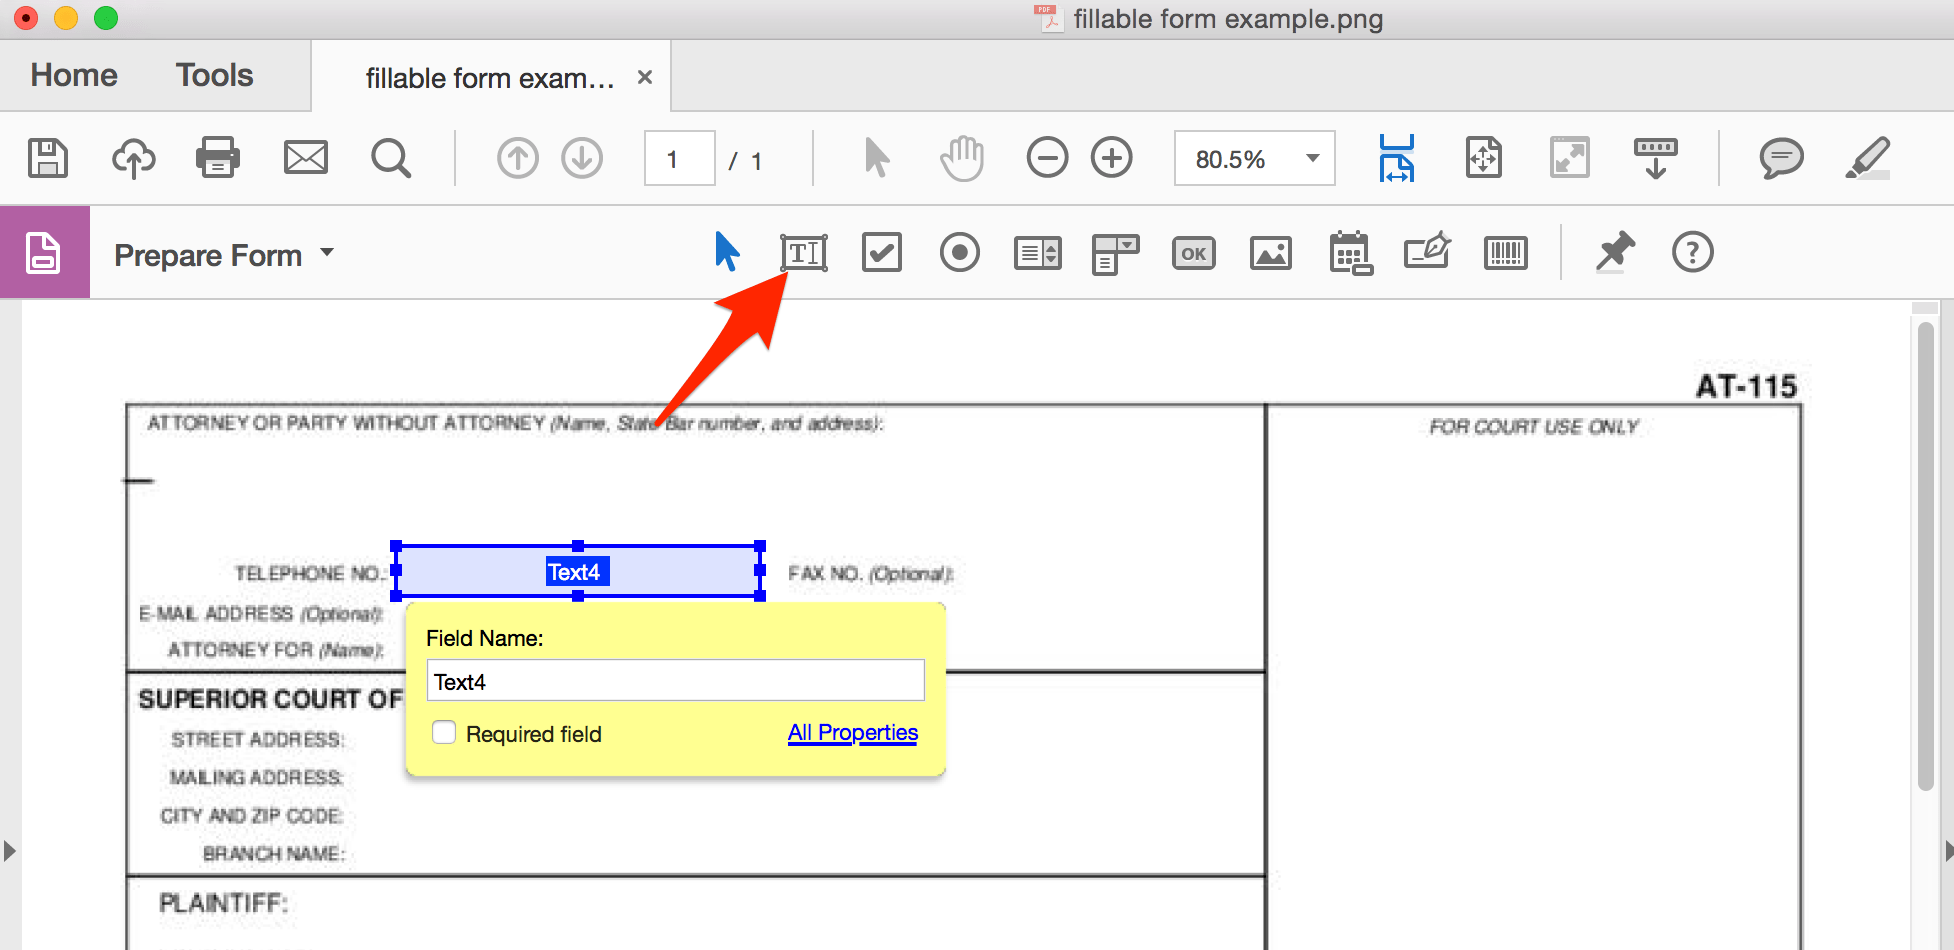
Once you click on the field type you want to enter, you’ll be able to drag and drop it to the correct location on the form. Once you’ve added all missing form fields, save your PDF. You’ve now created a fillable form!
Bates numbering
Bates stamping (the consecutive numbering of documents) can be easily accomplished in Acrobat. Gone are the days of painstakingly stamping long legal documents by hand — Acrobat can stamp thousands of pages in minutes.
STEP ONE
Open Acrobat and find Edit PDF in the Tools menu. This will open up the secondary tools toolbar at the top of the page. To begin applying Bates Numbering to your document(s) click on More > Bates Numbering > Add.

STEP TWO
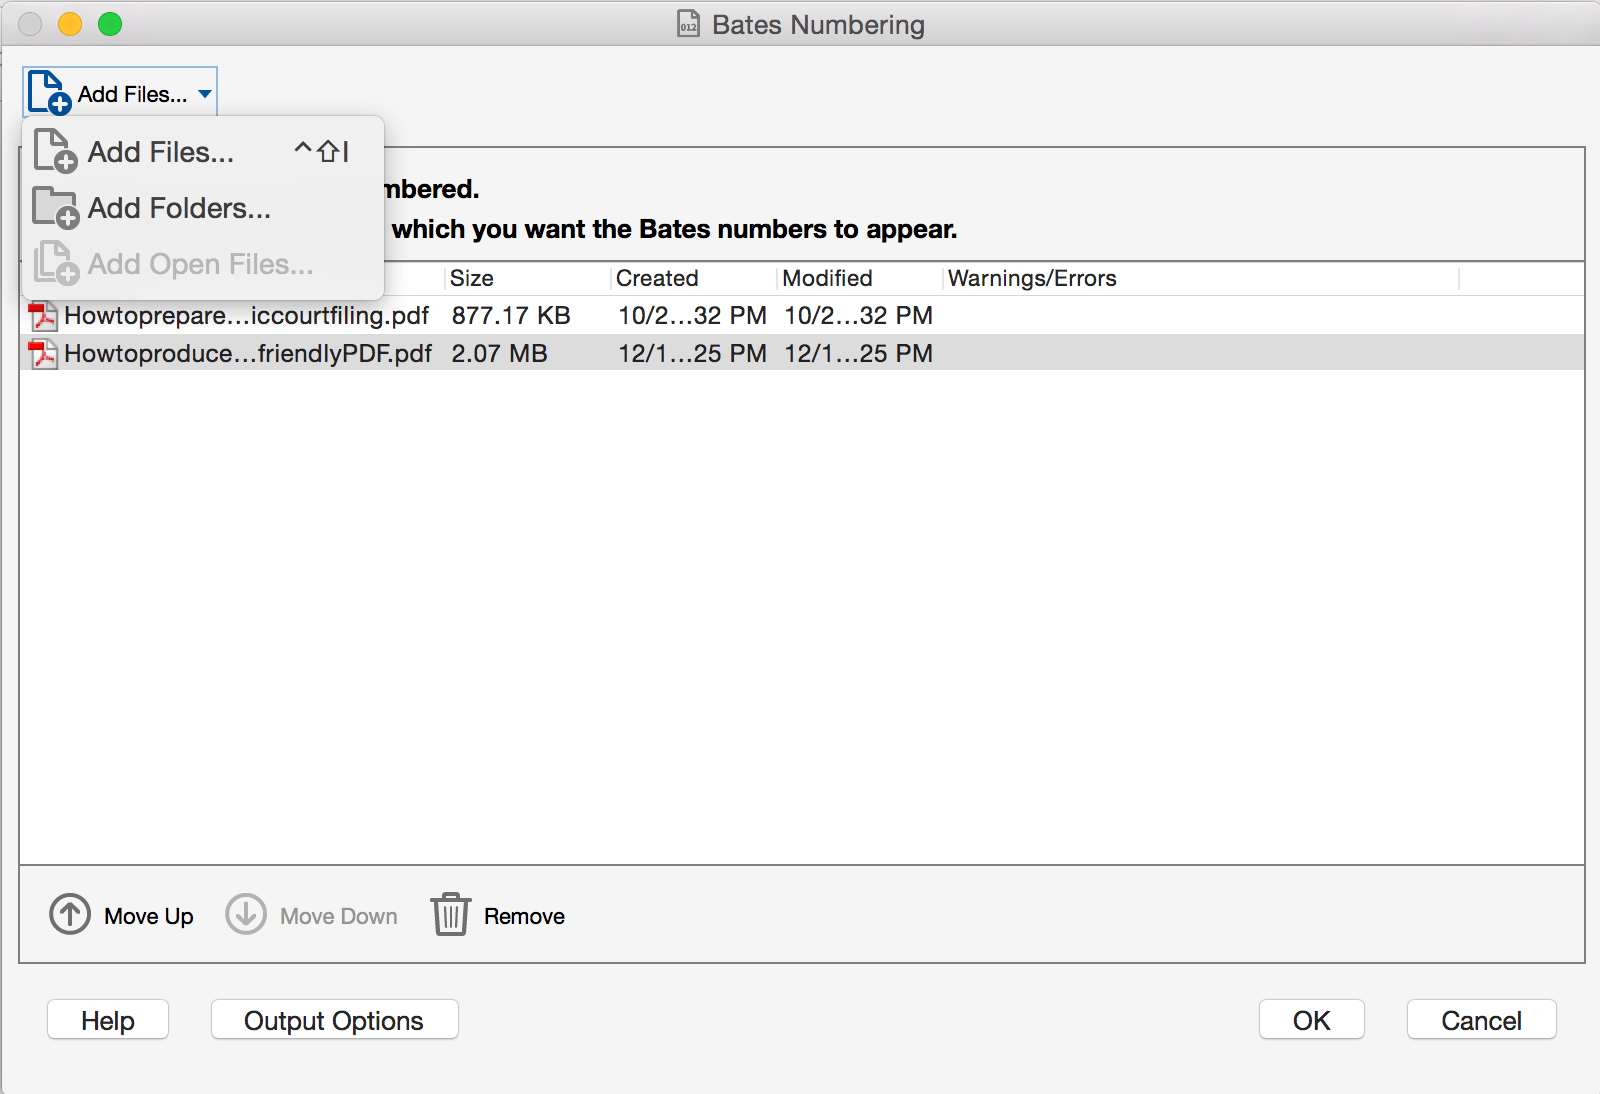
The Bates Numbering dialog box will have opened. Here, you can choose to add numbering to a single file, a number of files, or even an entire folder of documents. Add all of the files you wish to number and, as needed, re-arrange the order of files using the Move Up or Move Down options. When you’re ready, click OK.
STEP THREE
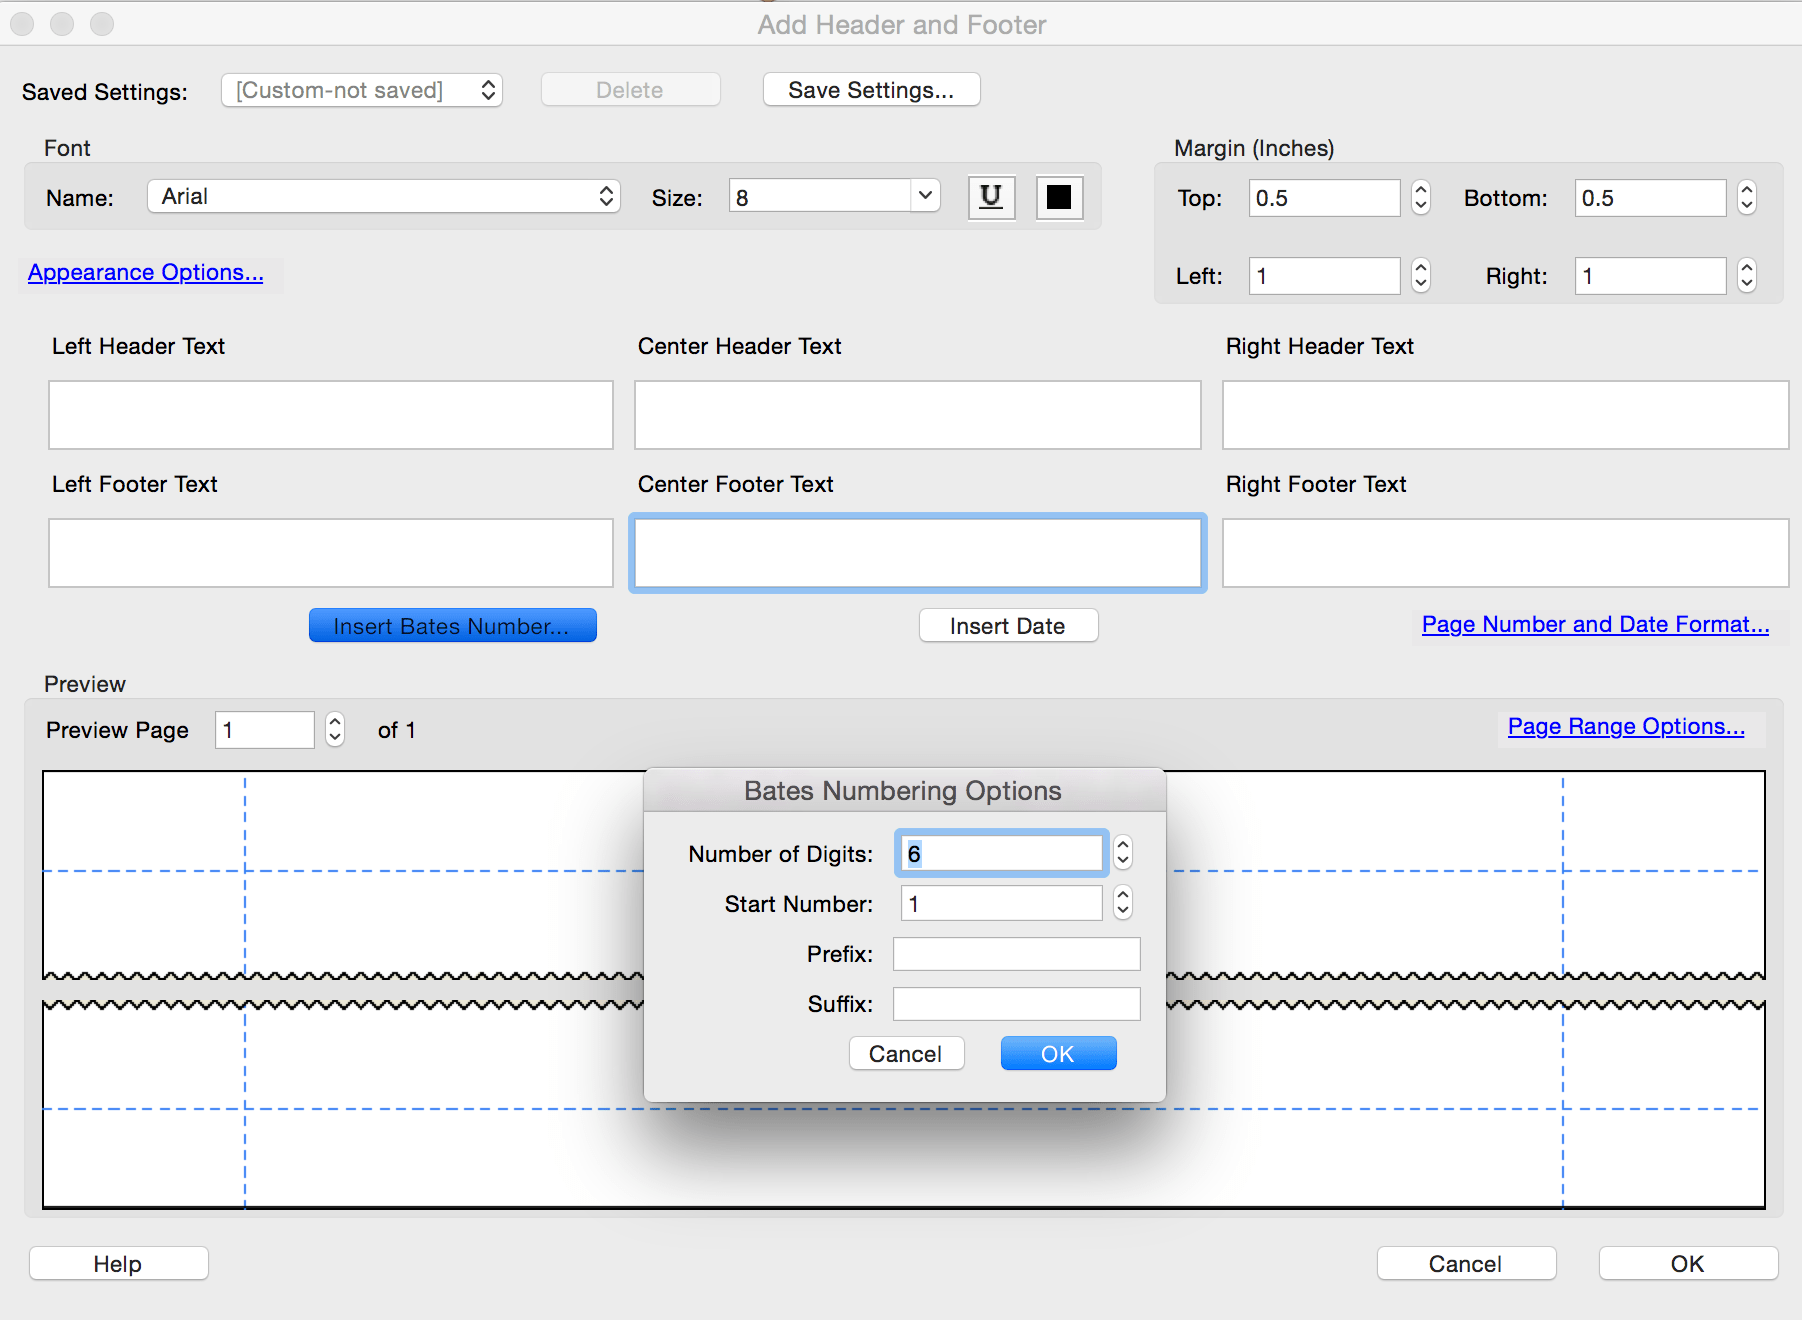
The Add Header and Footer dialog box will open. Simply choose where you’d like the Bates Numbers to appear and then click Insert Bates Number. Select your preferred style and start number, and click OK.
Add stamps
Acrobat’s stamps tool allows you to use a number of pre-loaded stamps, just like you’d use a rubber stamp. These include options like confidential, faxed, sent, received, and so on. It’s also possible, though, to add your own stamps, e.g. for exhibit numbers, by downloading additional stamp templates.
STEP ONE
Open your document in Acrobat. Now open the stamps palette by clicking on Tools > Stamp. The secondary stamps toolbar will now be visible at the top of your screen.
STEP TWO
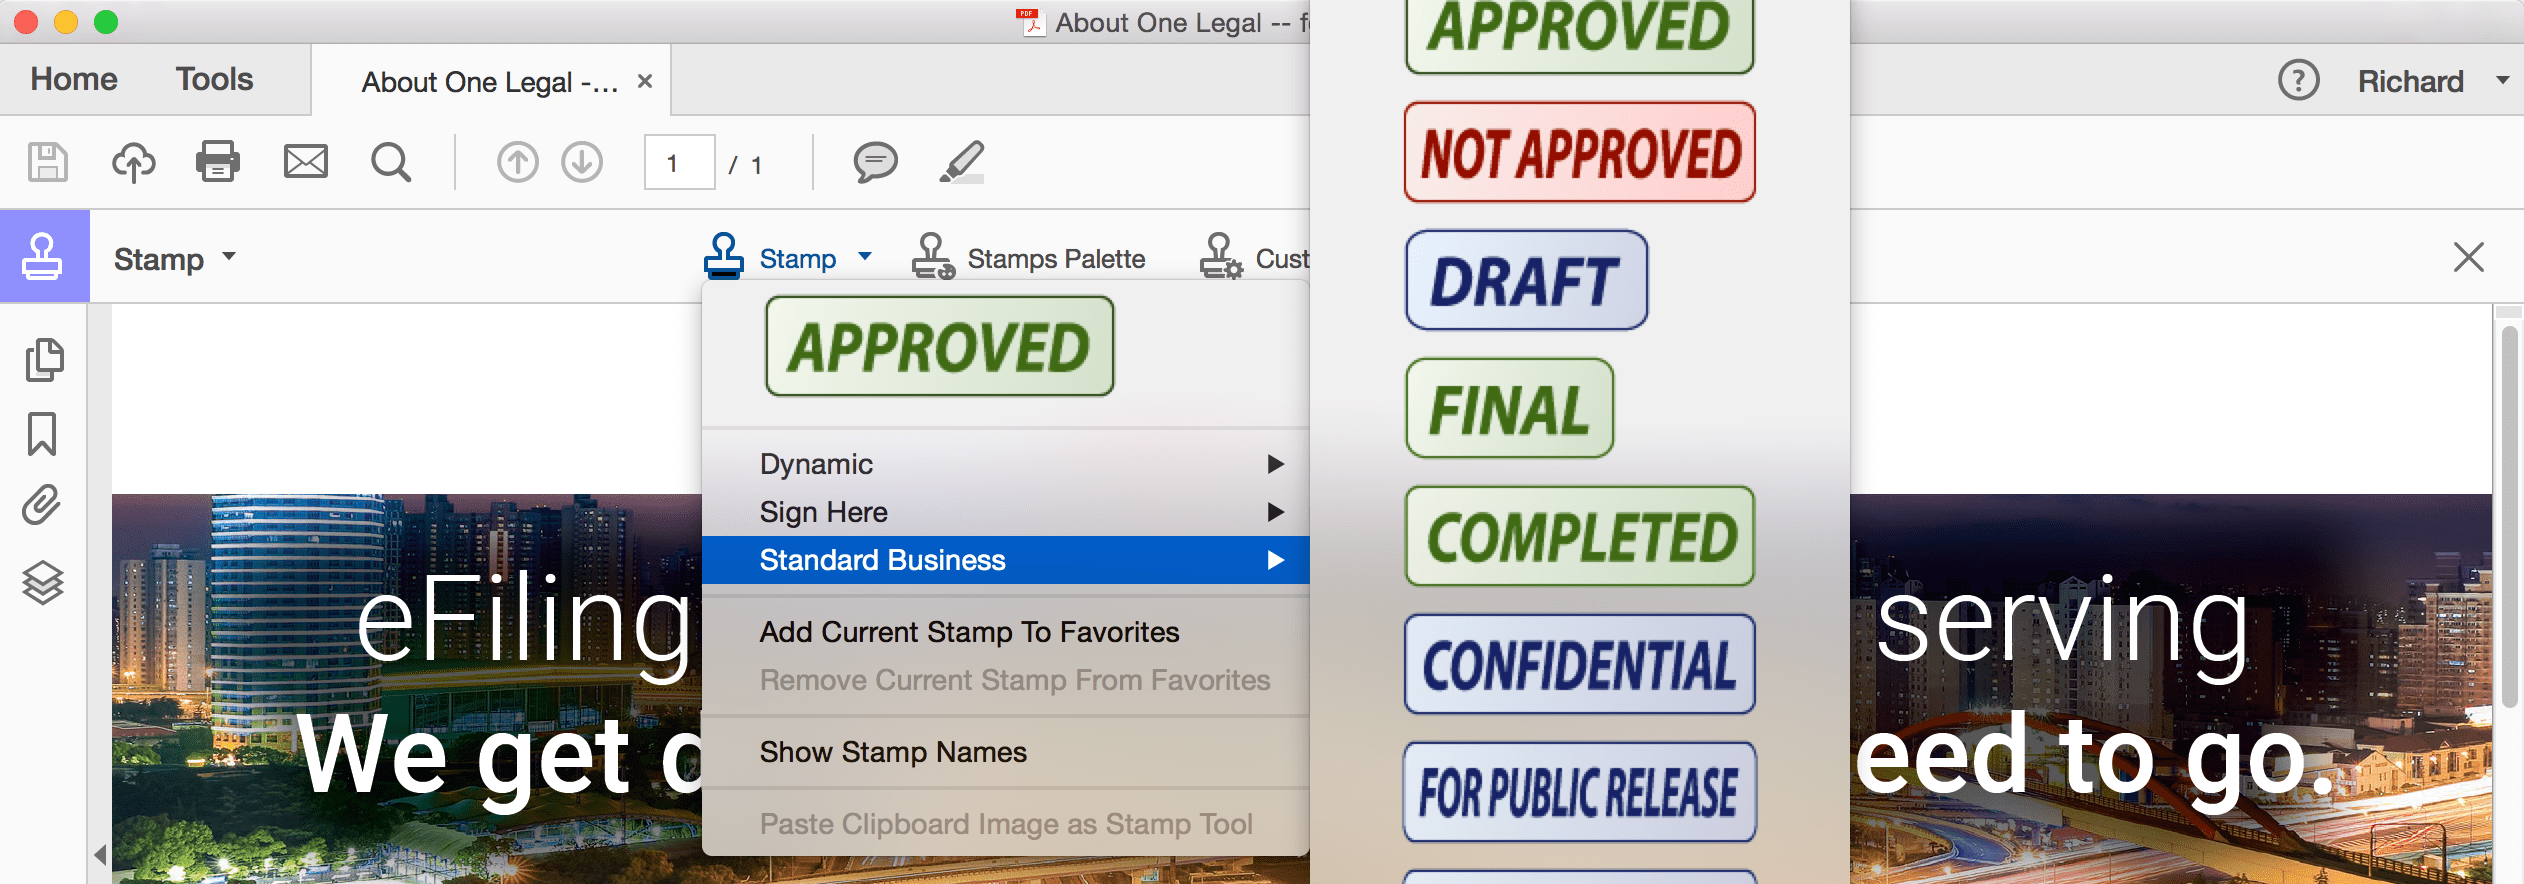
To add a stamp to your document, click on Stamp and choose your preferred stamp from those available. To insert it, click on the stamp. Once inserted, you can drag it to your preferred location on your document.
***
Are there any law office skills you’d like us to blog about? Let us know via the comments!


