Optical character recognition, usually abbreviated to just OCR, is the process of converting image files containing letters and words (such as scans or photographs) into searchable, text-based documents.
Now that the eFiling rules in many states, for example in California and Texas, require that electronically filed submissions (including exhibits) be text searchable, it’s important to understand the OCR process and how to spot and correct errors.
Read more: How to make a PDF text searchable >>
The biggest problem with the OCR process? It is very rarely perfect. While good quality originals (like screenshots or high-resolution scans of typed letters) may be recognized at 100% accuracy, poorer quality images will be less accurately recognized.
So, low-resolution scans or fuzzy faxes may not reproduce well. Similarly, handwriting will almost never be accurately recognized as text.
Therefore, when you scan images to include as exhibits in your court filing, it is very important to conduct an audit of the OCR results and correct any glaring and significant errors before considering the document finalized and ready to file with the court.
How to audit OCR quality
Acrobat offers a feature called “preflight,” part of which allows you to make the OCR text (that is the hidden text placed beneath the image that reflects the characters that the software recognized when OCR was applied) visible.
Here’s how you make that hidden text layer visible so that you can review its accuracy:
Step one
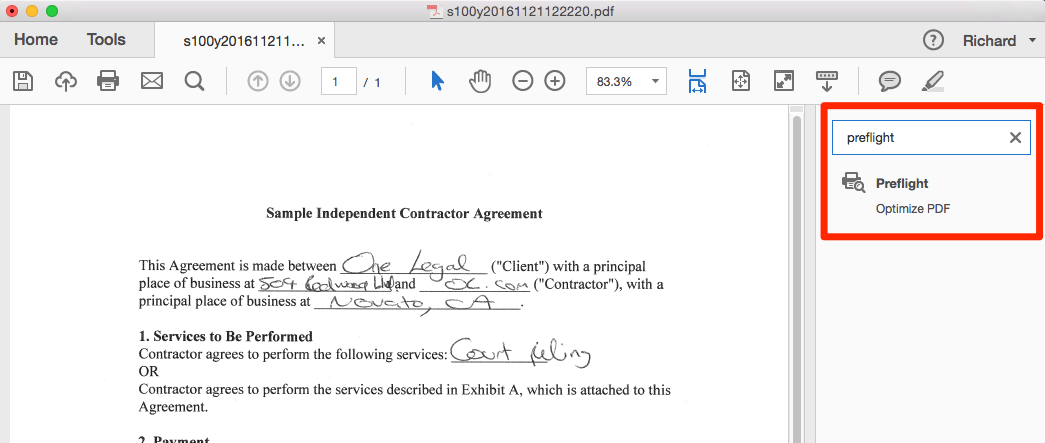
Open your OCR’d document in Adobe Acrobat. Now, in the right-hand tools panel, enter “preflight” into the search field. Select Preflight beneath Optimize PDF.
Step two
The Preflight dialog box will open. In the search field, enter “Make OCR.” From the options that appear, select Make OCR text visible and then click Analyze and fix.
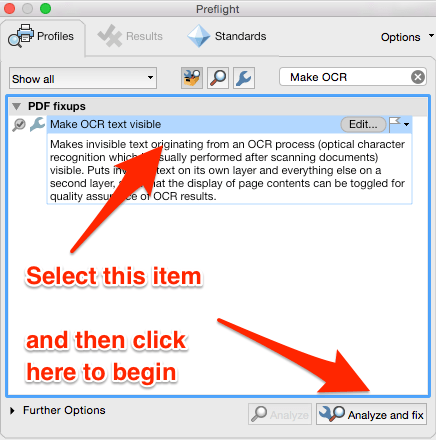
Acrobat will ask you at this stage to re-name your file. It’s recommended that you add a note, e.g. “_review” to the file name so that you can easily identify this version later on.
Step three
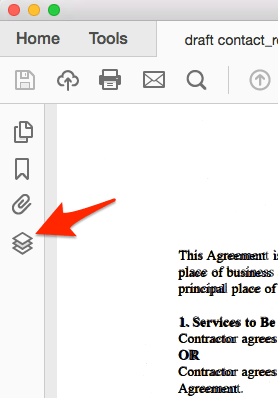
Now, to review the quality of the OCR that has been applied, you need to view the OCR layer. To view this layer, open the Layers panel by clicking on the layers icon in the left-hand menu.
Step four
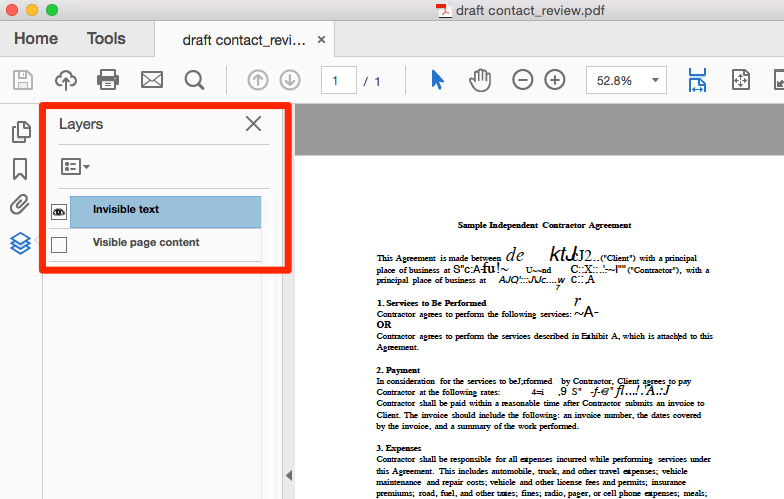
The Layers panel will open. You will see two available layers that can be viewed. By default, both the scanned image and the invisible text are displayed. To review the quality of the OCR, you need to disable the image so that you can only see the OCR layer. Uncheck the eyeball beside the Visible page content icon to turn it off.
Now, only the OCR text is visible on the screen. As you can see from the example, the quality of the OCR — especially for handwritten sections — is often, to put it mildly, rather low.
How to correct OCR errors
If the text that has not been correctly OCR’d is particularly pertinent, then you may wish to improve the document’s search quality by correcting the invisible text manually. Doing so is a two-step process in Acrobat:
Step one
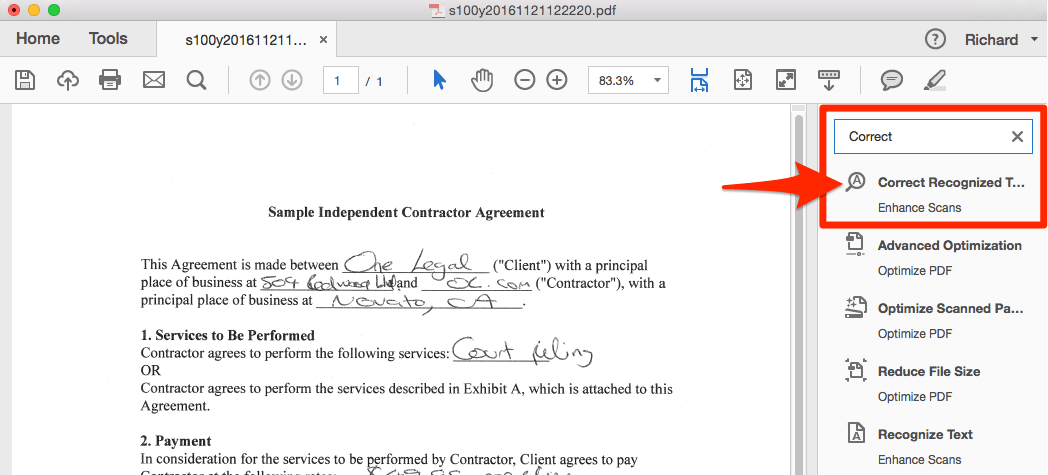
Open your OCR’d document in Acrobat. In the right-hand Tools panel search for “Correct” and select the Correct Recognized Text option beneath Enhance Scans.
Step two
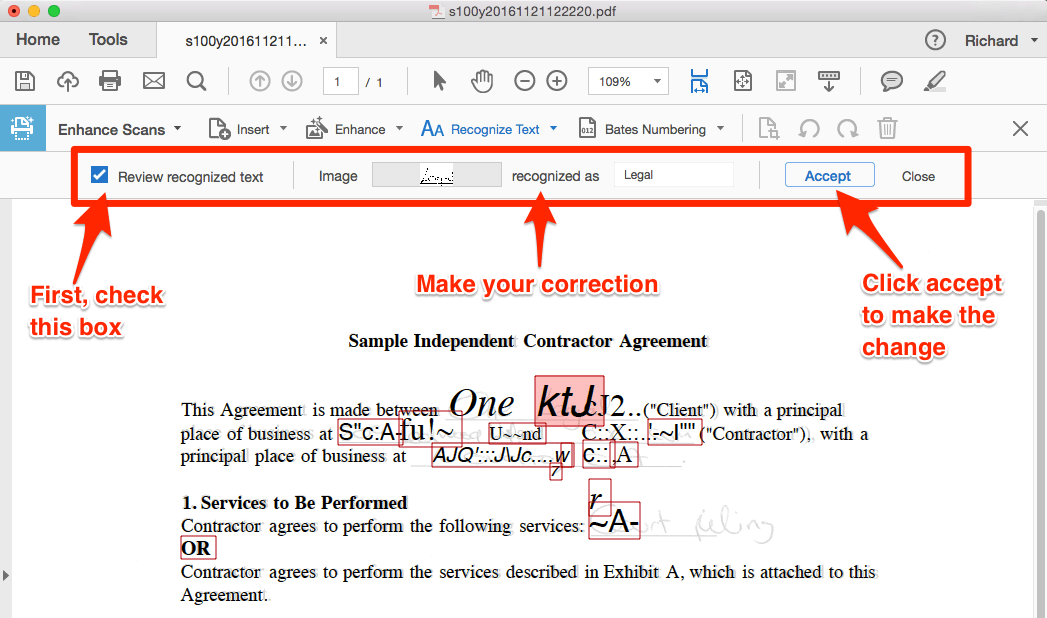
The Correct Text function will appear at the top of your screen. Check Review recognized text. Suspected errors will be highlighted in red. Simply select an error, type the correct text, and then click Accept.
As you can see, this is quite a time-consuming and laborious process. You may, therefore, choose to make a judgment based on both the importance of the document being filed and your best sense of the quality of the original to which you applied OCR when deciding how much effort you wish to give to auditing your PDF.
***
Free ebook: Core Adobe Acrobat skills for successful eFiling >>


